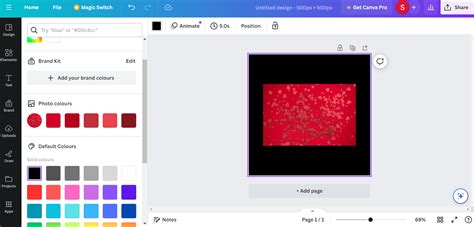
Canva continuously evolves, introducing new features and shortcuts to streamline the design process. This guide focuses on how to effectively resize designs and individual elements within Canva, ensuring you can adapt your creations to various needs and formats.
Resizing Entire Designs with Magic Resize
Magic Resize is a powerful tool that allows you to resize your designs to different dimensions or formats, saving you considerable time and effort. This feature is available for Pro, Business, Enterprise, Education, Higher Education, Nonprofits, and Teams plan users with specific roles.
To use Magic Resize, navigate to the editor menu bar and select Resize. You can choose from suggested common design sizes, browse by category, or enter your own measurements using the Custom size option. Here, you can also choose to lock or unlock the aspect ratio.
You have the option to apply the size change to All pages or select specific pages. After choosing your desired sizes, you can either select Copy & resize to create new designs in the chosen formats, or Resize this design to modify the original directly. If you choose Copy & resize, the new designs will be saved in the same folder as the original, or in a new folder if multiple sizes were selected.
Resizing Design Bundles
For even greater efficiency, Canva offers Bundles, which group common document types like social media posts or video formats. You can access these under the Suggested tab when you select Resize. Within a bundle, you can customize the selection by checking or unchecking specific formats before proceeding with Copy & resize.
Working with Size Limits and Workarounds
Canva has specific limits for resizing designs:
- You can resize up to 50 designs at once.
- You can select up to 5 new sizes per design.
- The maximum of 250 total resized outputs per bulk action.
The minimum and maximum dimensions for resizing are:
- Minimum dimensions: 40 x 40 px
- Maximum dimensions: 8000 x 3125 px
If your target custom dimensions fall outside these limits (indicated by the fields turning red), you can use a workaround. Enter your target dimensions, then select Lock the aspect ratio. Adjust one of the dimension fields to a value within the size limits; the other will update proportionally. You can then download your design in PNG format at sizes ranging from 0.5 up to 3.125 times its original size.
Undoing Design Resizes
If you resized a design directly (not a copy) and wish to revert, you can use the Version history. Access it via File > Version history. From there, you can select an autosaved version to restore or make a copy of it.
Troubleshooting Magic Resize
If you cannot find the Magic Resize feature, ensure you are not working within a Canva Doc, as it is not supported there yet. For Canva Docs, consider using Magic Switch to transform your document into a presentation.
If resizing is not working as expected, check the following:
- Selection continuity: Resize only works with a single block of cells. Ensure you haven't selected separate ranges.
- Design links: Each cell should contain only one Canva design link.
- Access rights: You can only resize designs that you have editing permissions for.
Resizing and Cropping Individual Elements
Beyond resizing entire designs, Canva also offers precise control over individual elements, photos, text boxes, and videos.
Resizing Elements
To resize an element, click on it to select it. For multiple elements, click and drag a selection frame around them. Then, click and drag any of the resize handles on the corners of the selection to make the element bigger or smaller. In Canva Docs, elements can be resized up to the full width of the page.
For text elements, using the font size option on the editor toolbar provides finer control.
Advanced Resize Options
For exact measurements, click Position on the toolbar above the editor. Under the Advanced section, enter the desired pixel values for Width and Height. Select Ratio to maintain the element's proportion. To resize or stretch a photo without maintaining its aspect ratio, double-click it to enter crop mode, hold Shift, and drag a resize handle.
Cropping Elements
Cropping allows you to hide parts of an element to focus on a specific area. Click the element you wish to crop, then click Crop on the editor toolbar. You can also double-click an element to access crop settings. Adjust the crop handles to define the visible area and resize the element within the crop space as needed. Click Done or outside the element to finish.
For media within frames and grids, simply double-click to enter crop mode.
Resize and Crop an Image in Canva
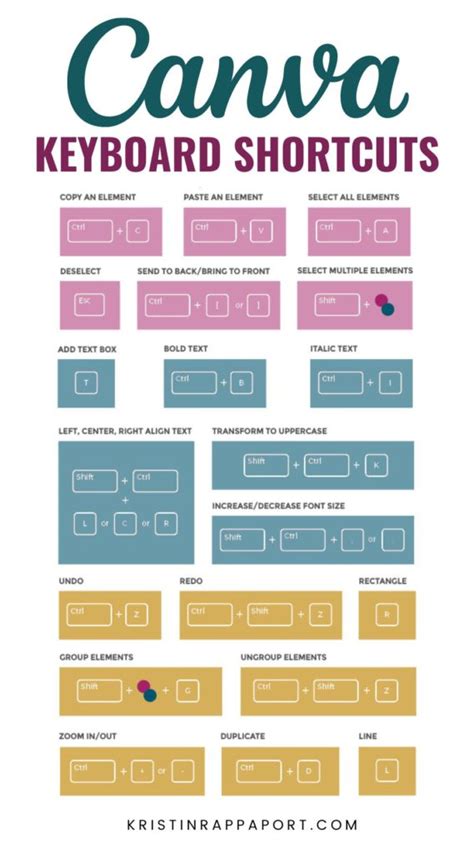
Keyboard Shortcuts for Enhanced Workflow
While not strictly resizing, keyboard shortcuts can significantly speed up your design process, including elements related to layout and selection.
- Magic Menu (/): Opens the Canva Assistant.
- Undo (Command-Z on Mac): Reverts the last action.
- Redo (Command-Y on Mac): Re-applies an undone action.
- Shapes (R for rectangle, L for line, C for circle on Mac): Quickly insert basic shapes.
- Group/Ungroup elements (Command-G / Command-Shift-G on Mac): Manage multiple elements as a single unit.
- Arrange elements (Command-] / Command-[ on Mac): Move elements forward or backward in layers.
- Zoom in (Command-+ on Mac): Get a closer view.
- Zoom out (Command- on Mac): See the bigger picture.
- Zoom to fit (Option-Command-0 on Mac): Fit the entire design to your screen.
- Zoom to fill (Shift-Command-0 on Mac): Fill the screen with the design.
tags: #canva #progiban #a #parancsikonok #meretezese